Finding the ~perfect~ pair of vintage distressed jeans is hard. It seems like the pair that has the perfect rips and tears doesn’t fit or the ones that fit have holes in all the wrong places. Fear not though, creating exactly the look you want is totally possible. Easy even. Read on to see how I distress jeans to look exactly how I want!
You Will Need
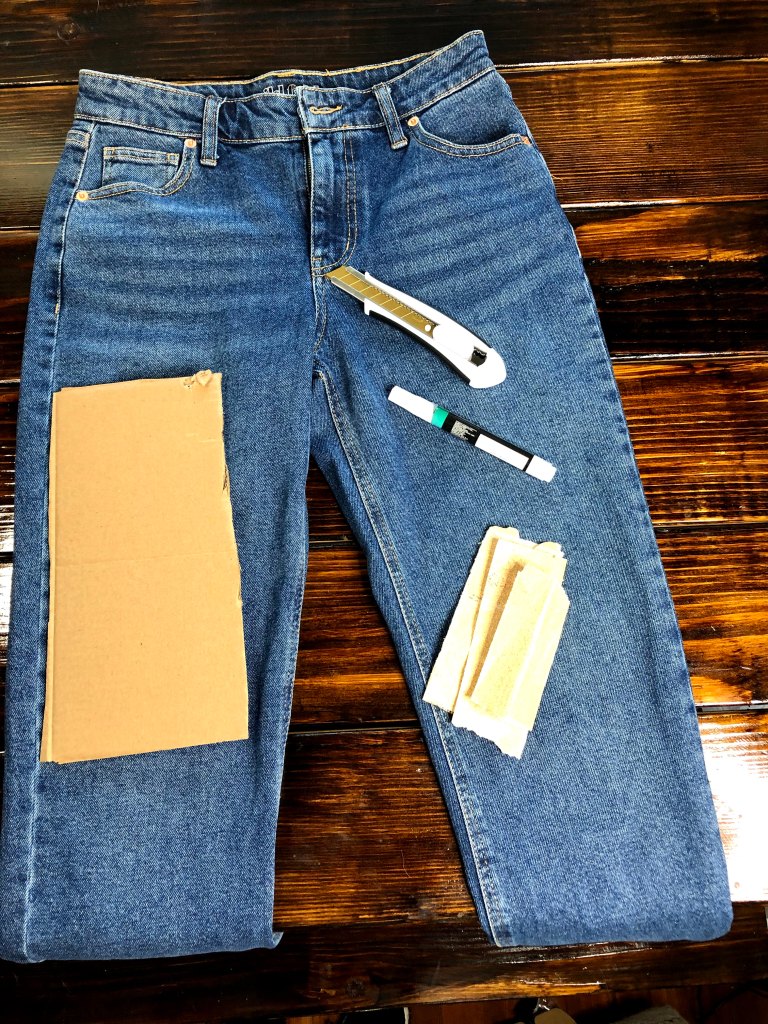
One pair of jeans
Paint pen/ sharpie/ colored pencil/ piece of chalk- whatever you have around to mark where you want to place the holes
Box cutter
Sand paper (but in a pinch I’ve even used an emery board)
Piece of cardboard that fits in the leg of the jeans
What you Do

- Choose the right pair of jeans for the job.
You’ll want jeans that don’t have a ton of stretch to them. A jegging won’t work as well because the edges of the hole will have curly, stretchy threads and roll up instead of staying flat and having those iconic vintage white strings
I used these $22 jeans from Target in this tutorial. They’re a straight leg, and a nice thick denim, plus they had this really cute raw edge, which i love to wear with a good combat boot or cuff up to make into a crop style
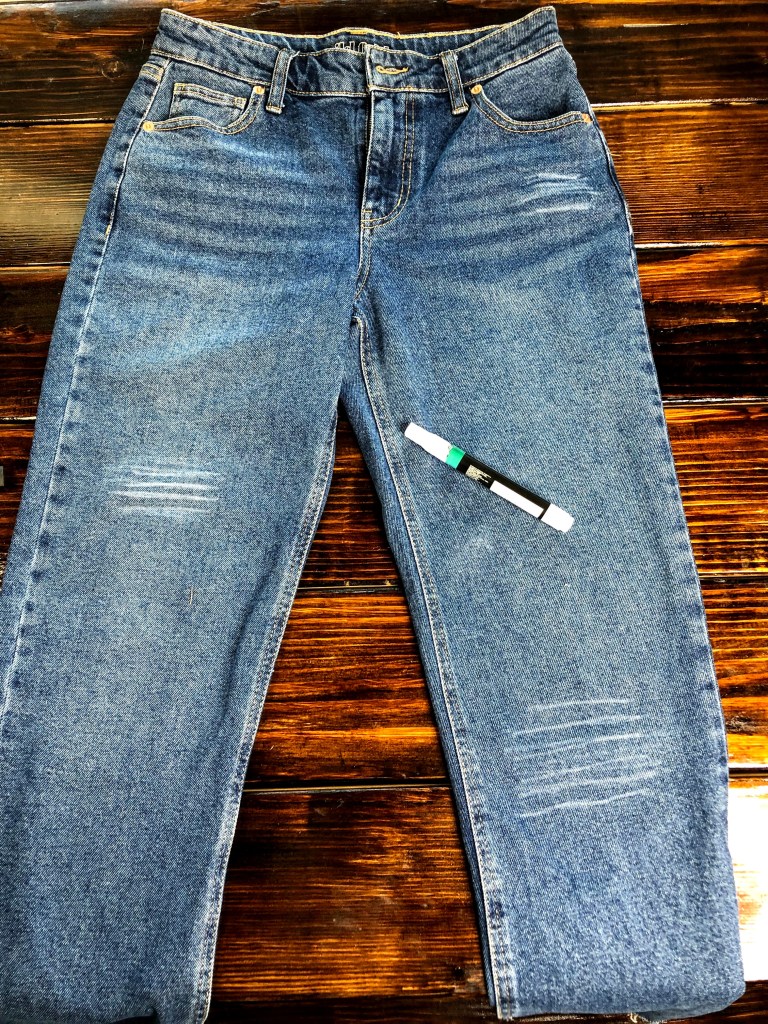
2. Draw horizontal lines across the areas where you want to cut. You can do this while wearing them to make sure you get the holes in the right places or you can eyeball it.
The ends of the lines on the sides will be the side edges of your holes- if you vary the length of the lines you will create a more organic, natural looking hole rather than a perfect rectangle. The closer together you make your lines, the more open the hole will be. The further apart the lines are, the more white strings will be left across the hole.
I personally don’t want the holes to be the same on both legs unless I’m slashing all the way down the whole front. To avoid this, I usually do an odd number of holes- 1 on one side, 2 on the other, or 2 on one side 3 on the other.
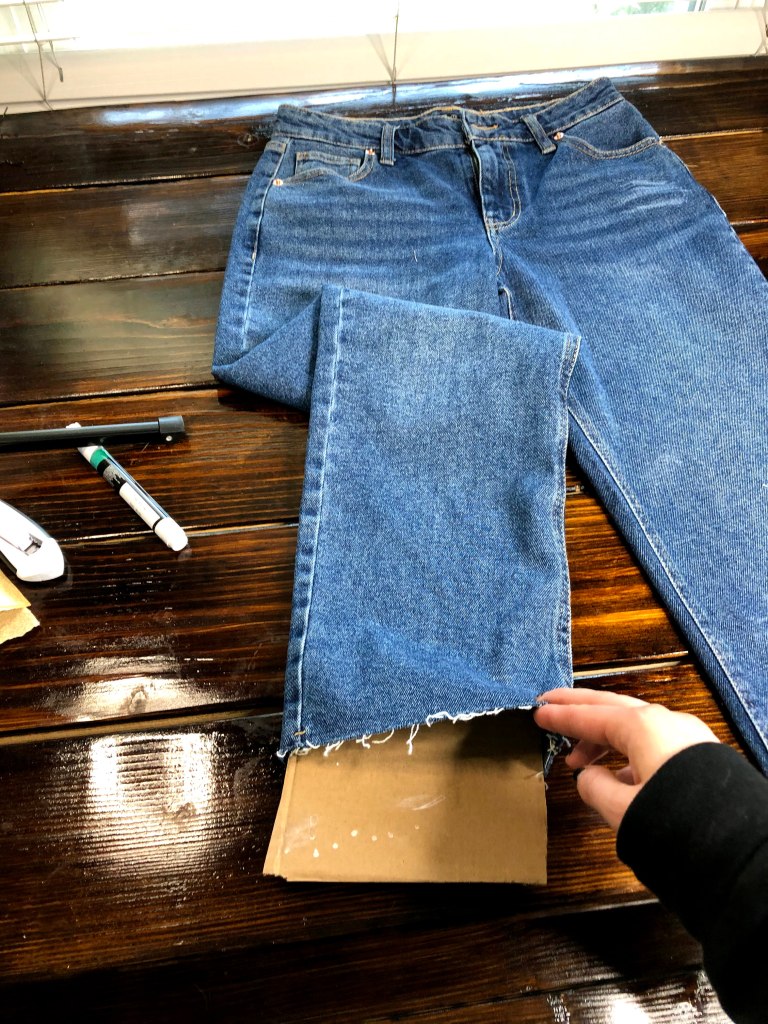
3. Place the cardboard in the leg of your jeans, underneath where you drew your lines.
If you don’t put it in there, you’ll cut through the back of your jeans when you cut your holes.
Make sure your cardboard is big enough that all of your marks are completely on top of it.
I do like putting a hole across the back of one leg, but I don’t want it to be in the same place as a hole on the front, but to each their own on that one.
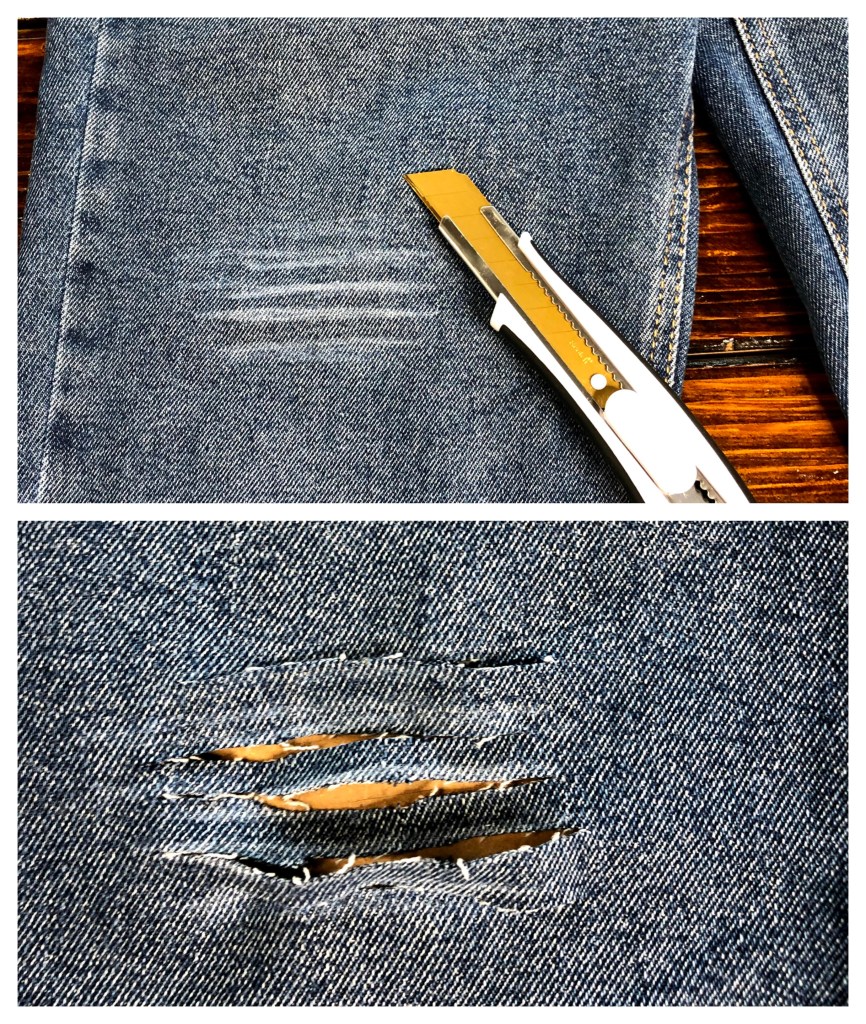
4. Cut along the lines in your jeans
Be careful when you do this- if your lines are all perfectly horizontal, you will have many more white strings across your holes.
That’s my big secret to distressing my own jeans- ONLY CUT HORIZONTAL LINES! Don’t cut around the area you want to to be a hole, or its just a chunk missing- cutting many slashes in the fabric and letting it fray out makes it look like they ripped more naturally.

5. Use the sand paper/ emery board to fray the edges of your hole- warning, this will get blue lint literally everywhere
I just roughly scrub all over the entire area I cut until I like the look of the edges.
If there are still blue strings caught in the white that’s okay. I just sand enough of it away that I can get a general idea what the hole will look like.
This also helps to sort of “seal” the edges so that they don’t continue to fray later.
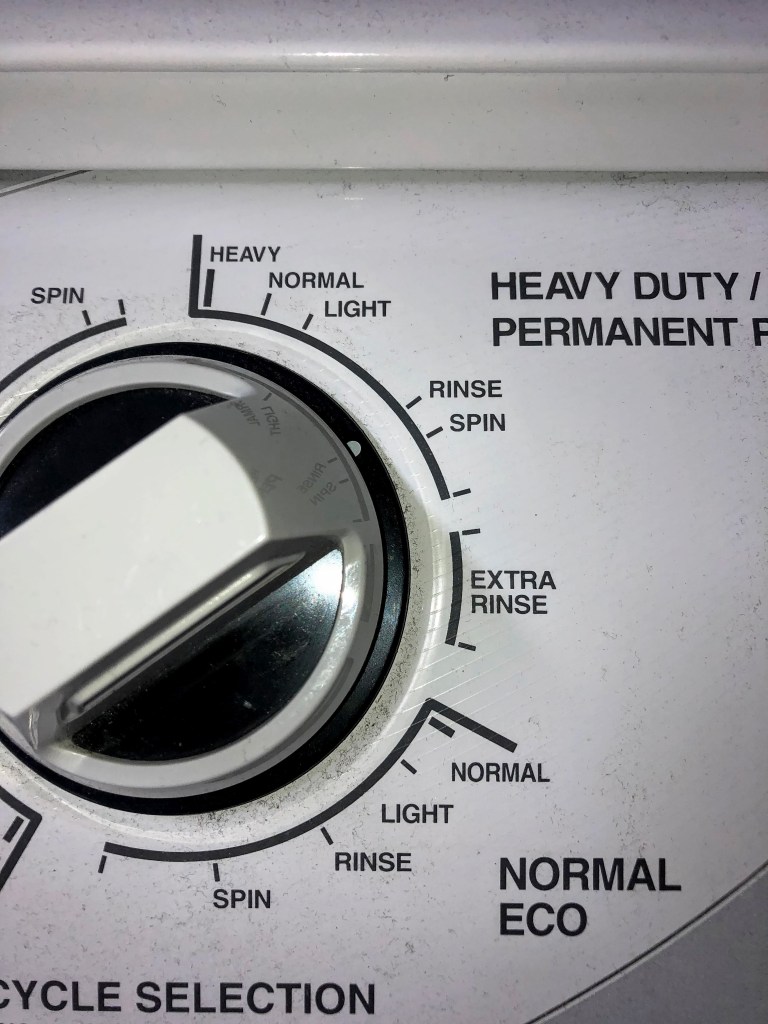
6. Throw your jeans in the washing machine for a rinse and spin cycle and then put them in the dryer until they are completely dry.
This helps pull the leftover loose blue strands out the white strings without all of the effort it takes to remove them by hand
That’s it, they’re ready to wear. Simple as that. The nice thing about this is that you can keep adding holes and make the existing holes bigger if you don’t like how they look anymore. I’ve also done this to denim jackets using the same steps. As long as your denim doesn’t have a lot of stretch to it, you can use this method to distress it to your heart’s desire!